Master C is 4!
The night before his birthday we tucked him in bed and recited this beautiful verse that was included in the orientation papers from our local Steiner School, where Master C begins pre-kinder next week:
When I have said my evening prayer
And my clothes are folded on the chair
And my mother switches off the light
I’ll still be 3 years old tonight
But from the break of day
Before the children rise and play
Before the darkness turns to gold
Tomorrow I’ll be 4 years old
Four kisses when I wake
Four candles upon my cake.
I had planned to read Master C The Little Angel’s Journey that night as well; a birthday story that tells the tale of a young angel’s journey across the Rainbow Bridge to a new life and incarnation on earth as a precious and much wanted child. Unfortunately I wasn’t able to track down a copy of this beautiful book in time for Master C’s birthday this year, so instead we decided to spin our own tale. Big Daddy and I sat with Master C quietly in his darkened room and told him about the night four years before when I had been woken in the night with the knowledge that the time was nearly here to meet our baby boy. We told him all about our peaceful journey in the very early hours of the morning, driving through the deserted streets of Melbourne to the hospital in the city where he was to be born; about how excited all of the nurses were at the hospital when we arrived, knowing that little Master C would be joining us soon. We told him about the moment I first held him in my arms and we first gazed upon one another. He lay quietly in his bed, listening intently, enrapt with the wonder of his own anticipated arrival on earth and into our arms. This birthday, I have put a big emphasis on letting him know just how loved, wanted and cherished he is – in our family, in our lives and on this planet.
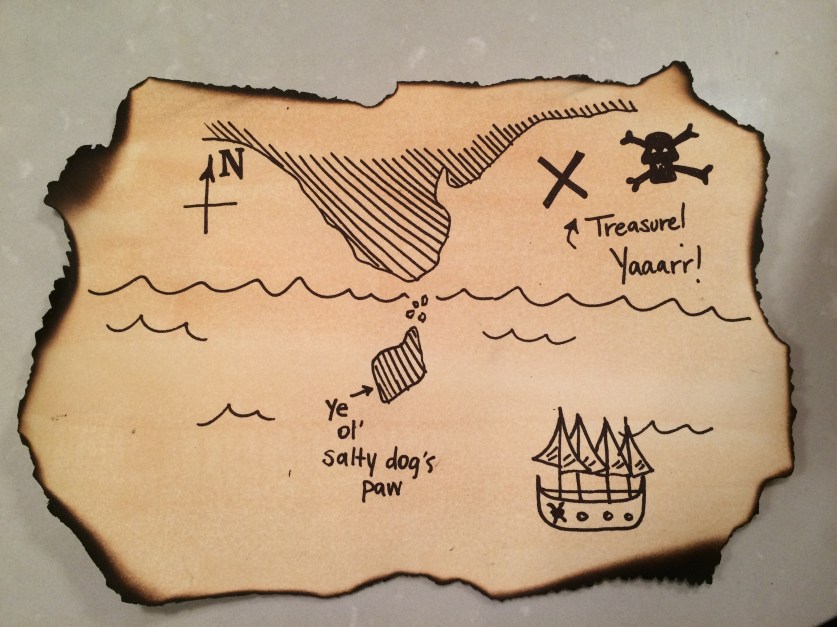
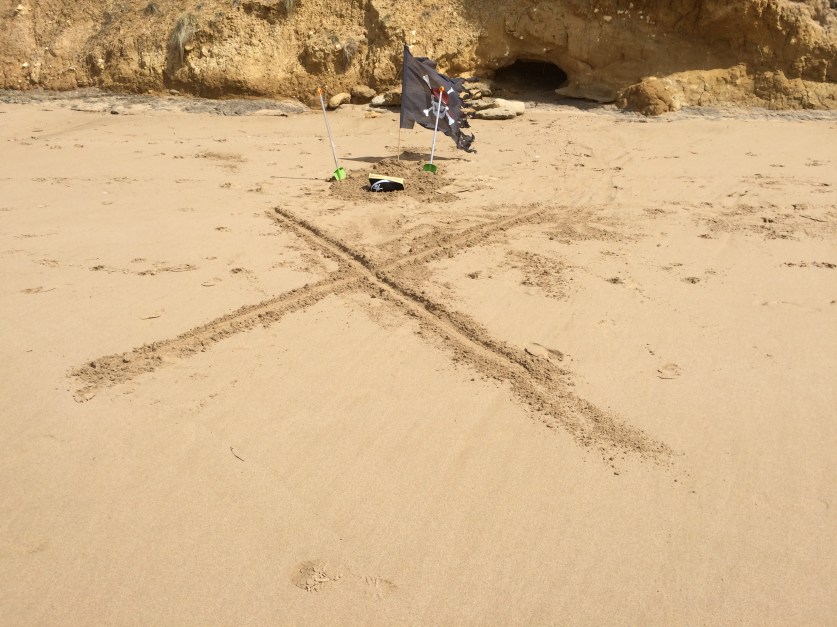
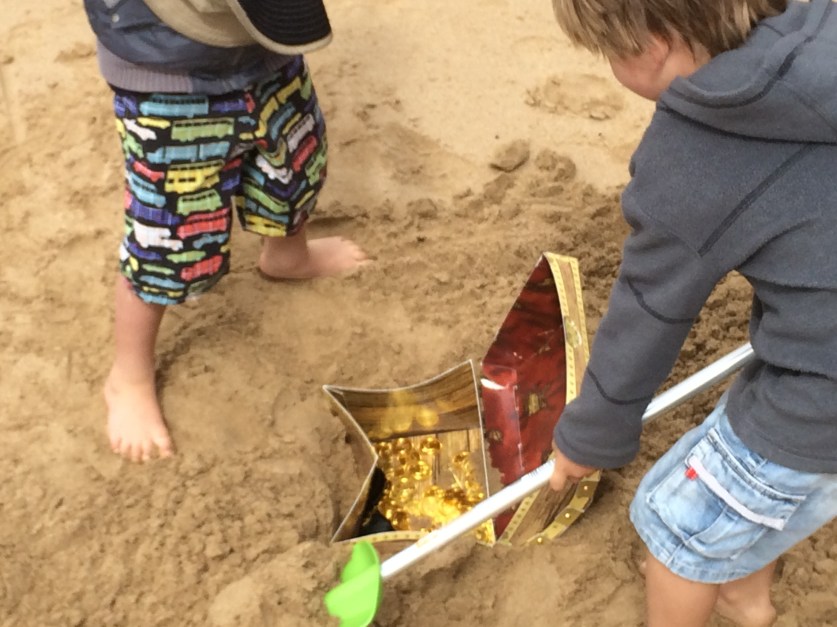
The next day, Big Daddy and I had prepared a pirate treasure hunt on the beaches of Jan Juc, complete with treasure map and buried treasure. Together with just one special friend, Master C “found” a message in a bottle leading the boys to the location of the pirate booty, stealthily buried while the kids were busy chasing waves during low tide.


After that we joined family, many of whom had traveled several hours to be there, for a casual lunch at a beachside cafe. There was a cheesecake this year, at the birthday boy’s request. Caramel. 🙂
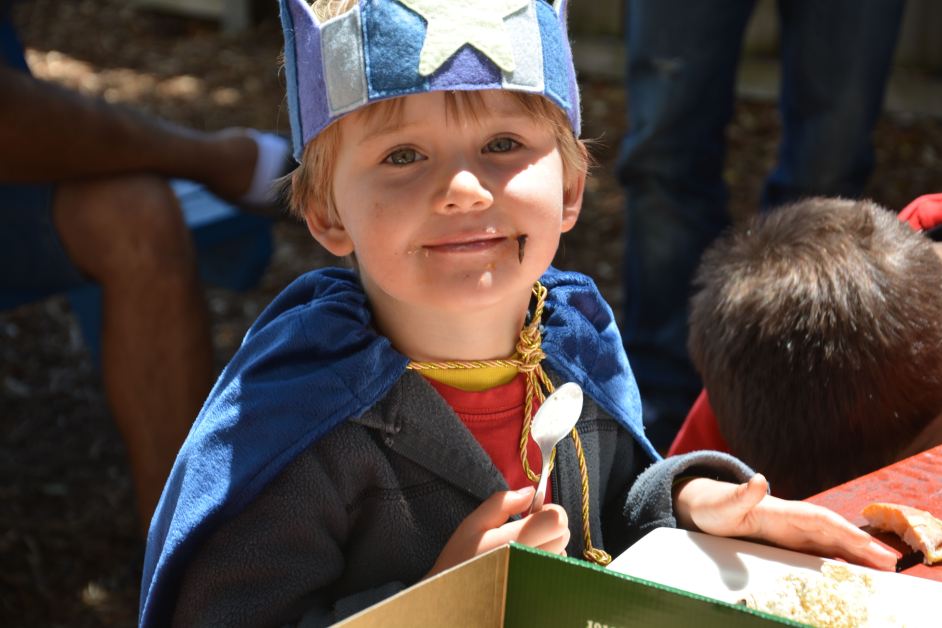
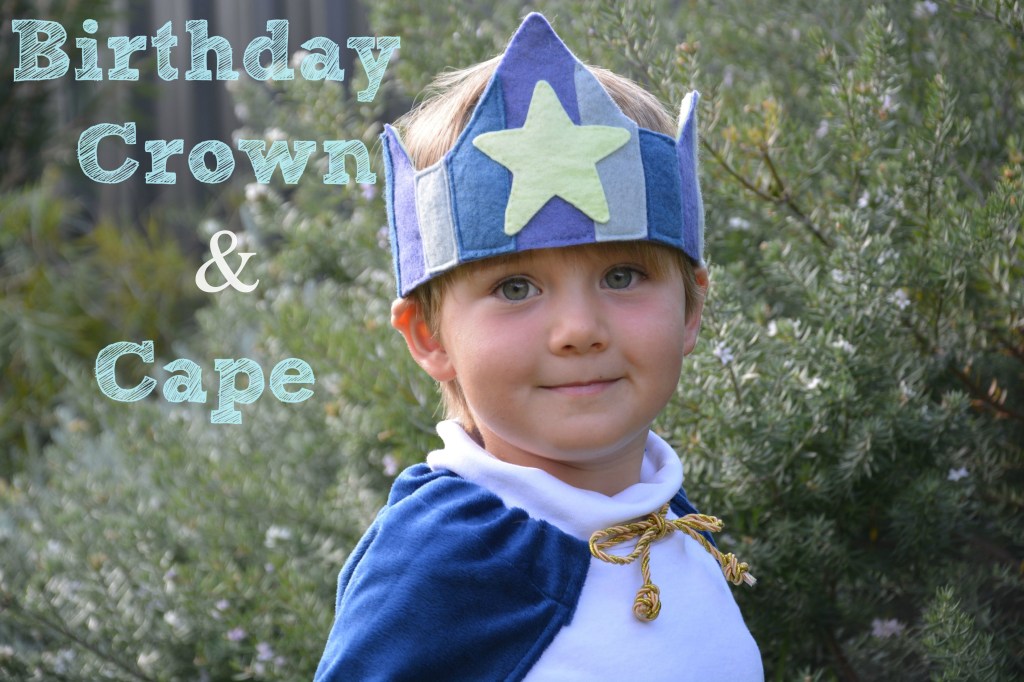
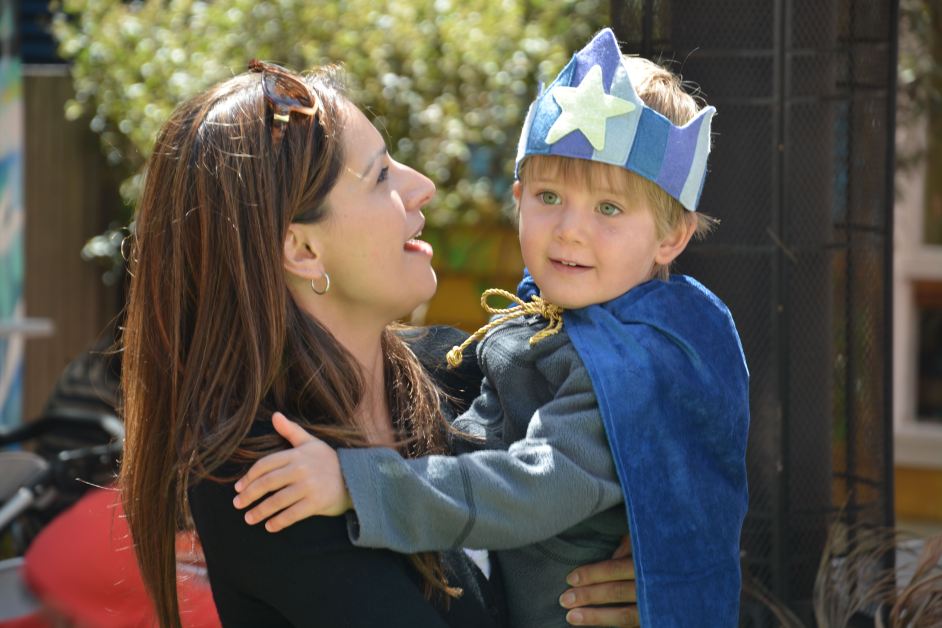
I made the birthday crown and cape over the course of a few nights in the New Year. The crown is elasticised at the back so hopefully will fit for many more birthdays to come. Both the crown and the cape were easy to make, even with my modest crafting experience and skill. I bought the wool felt necessary for the crown from Winterwood Steiner Inspired Toys, and the rest of the supplies from Spotlight. For the cape, I purchased a length of minky in royal blue and some gold cord to tie at the neck, also from Spotlight.
Interested in making your own birthday crown and cape? Full directions below.
*PLEASE NOTE: These measurements are based on my son’s height and head circumference. You should measure your child’s head and judge the length of the cape as appropriate to your child’s dimensions.
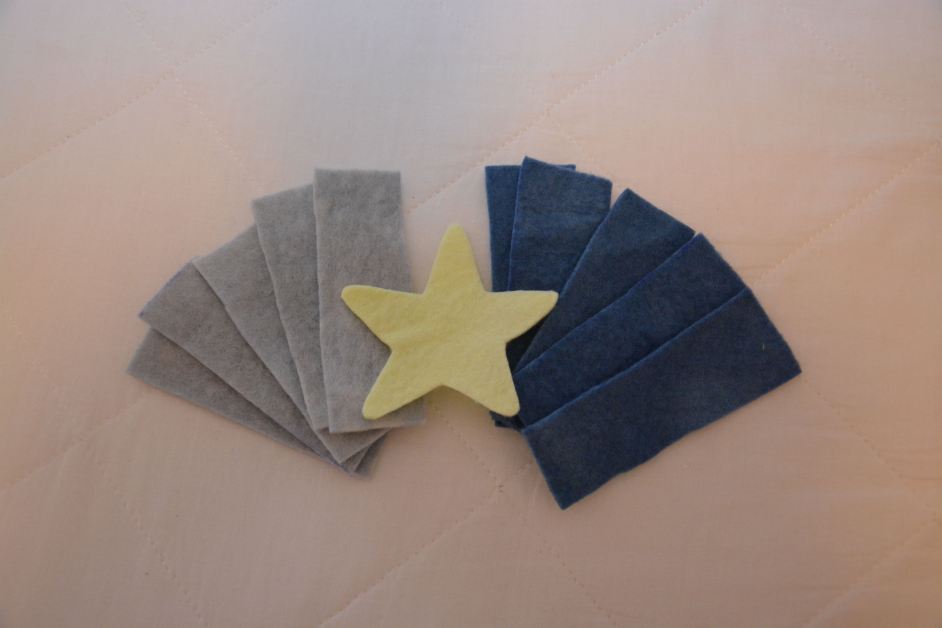
DIY Felt Birthday Crown

Here’s what you’ll need:
1 x Hand Dyed Wool Felt Sheet 20 x 45 cm in Sulphur Yellow
1 x Hand Dyed Wool Felt Sheet 20 x 45 cm in Sarsaparilla*
1 x Hand Dyed Wool Felt Sheet 20 x 20 cm in Apollo Bay*
1 x Hand Dyed Wool Felt Sheet 20 x 20 cm in Tasman*
8 cm length of elastic (2 cm width)
Transparent thread
*PLEASE NOTE: these are the colours I used from Winterwood’s colour chart, you should use whatever you see fit 🙂
Here’s what you do:
Print this PDF pattern twice ( We Do Waldorf Birthday Crown pattern FREE ), cut out and tape together along the midline, then trace pattern onto both the Sulphur Yellow and the Sarsaparilla felt sheets, and cut out. Cut out 5 rectangles that are each 9cm x 3 cm in both the Tasman and the Apollo Bay. Cut out a star shape from the excess Sulphur Yellow, approximately 8 cm in diameter.
On the machine or by hand, sew in the elastic to the Sulphur Yellow at hash marks on the pattern, then set aside. Lay your blue crown piece flat and evenly space the 10 rectangular pieces and then pin in place.

Flip the whole thing over and trace with a pen along the excess where the rectangle pieces extend past the edges of the crown. Cut to remove excess. Flip back over and, with machine (or by hand), sew in each rectangle. Once all pieces are attached, hand sew your star in the centre. Pin the blue and the yellow crown pieces together, so that the elastic is sandwiched in between the two.
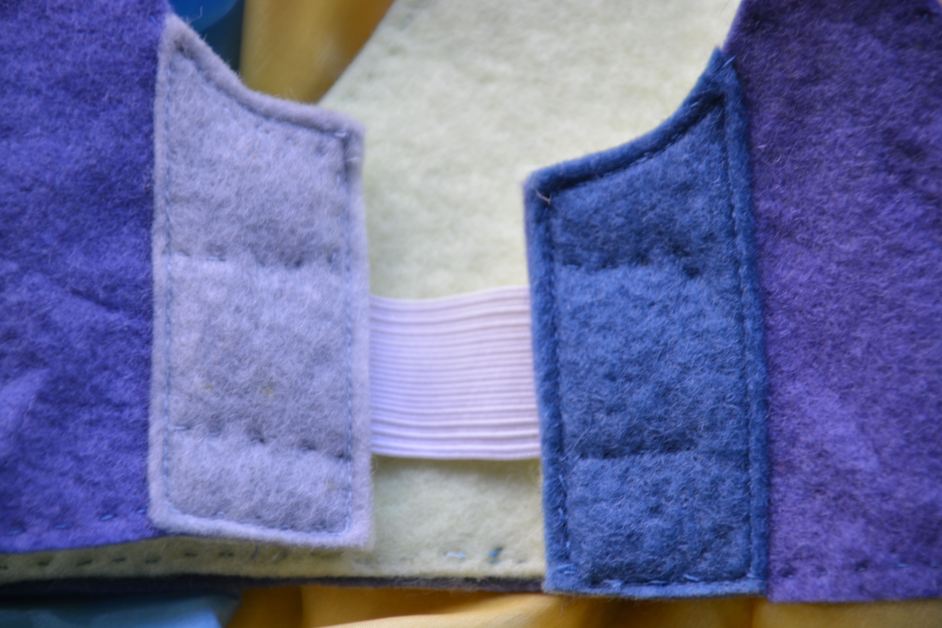
Hand stitch around the whole perimeter, and also around the outside edges of the elastic, to keep it sliding up or down. Done!
DIY Birthday Cape
Here’s what you’ll need:
70 cm x 60 cm Royal Blue Minky fabric
Matching thread
90 cm gold cord
(All purchased from Spotlight)
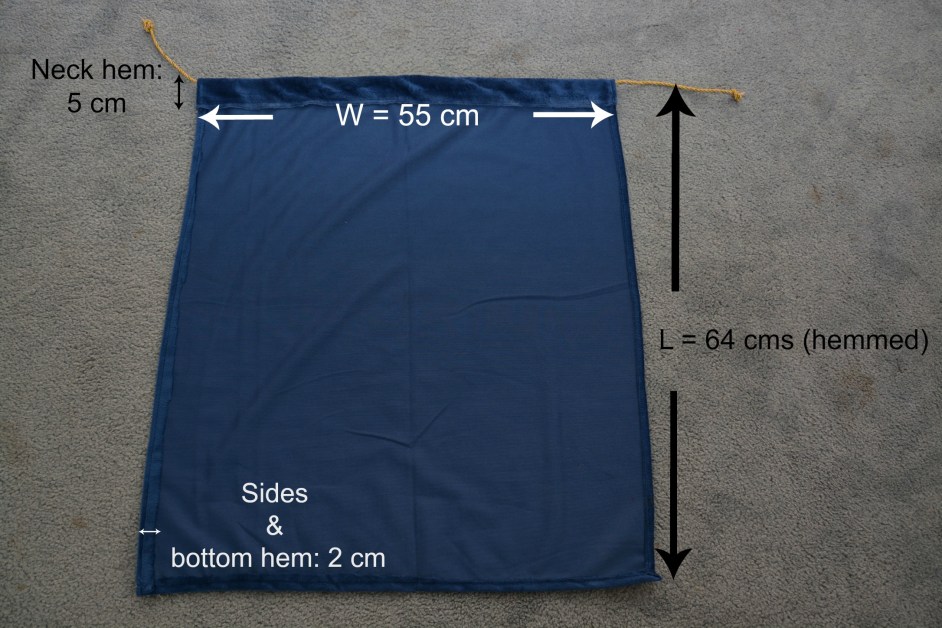
Here’s what you do:
Pin down sides and bottom hem to 2 cms and machine stitch. Pin down the neck hem 5cm from the top. Machine stitch two parallel lines near the edge of the fabric to reinforce the cord chamber, leaving a 3 cm gap for the cord to thread through. Put cord through and tie off each end. Voila, cape!
Thanks for joining in our birthday celebrations!
Love and blessings,
Robyn
xx

Leave a comment